Tutorial: Czech Button Earrings

By Cynthia Shanti Moralez
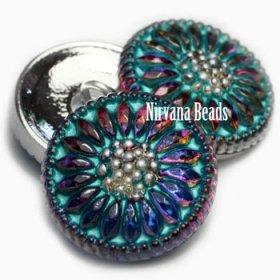
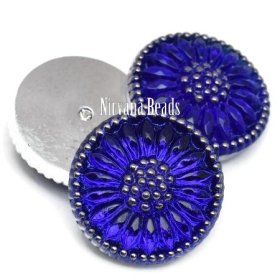
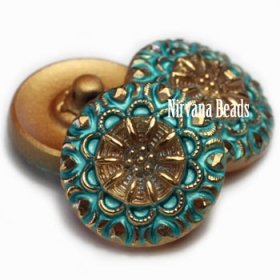
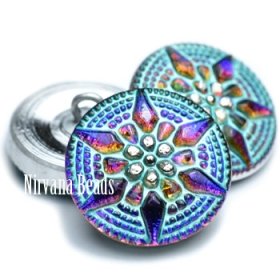
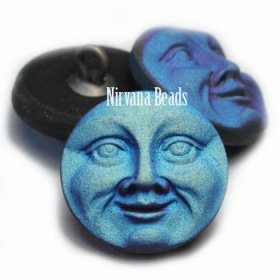
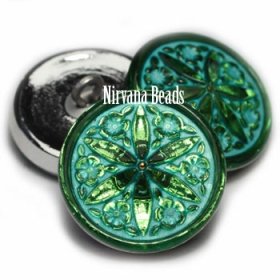
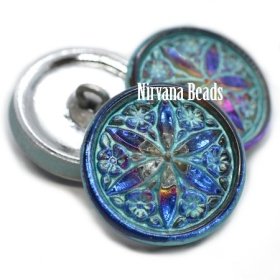
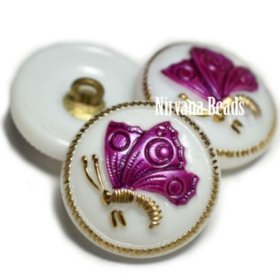
One of the best parts of our work is the excitement of opening the boxes of Czech buttons and beads when they arrive from the artisans in the Czech Republic whom we have come to know and respect. There is a timeless magic in the Czech buttons , each one forged by one individual with tools and techniques that date back to the 18thcentury.
When we make our annual Nirvana Beads trips to the Czech Republic it is both exciting so see our friends and their work — and sad to see them getting older. Although the cottage industry of Czech buttons and Czech beads has survived the displacement of two world wars, Communist takeover and all variety of business challenge, the greatest threat seems to be the lack of young people willing to take on the trade. It is a fragile industry we are proud to support financially and artistically.
Although our customers and friends have shared many amazing projects incorporating Czech buttons in bead weaving and bead embroidery over the years – I discovered a simple way to showcase the beauty of 18mm buttons for simple, elegant and exciting gifts (and of course, you’ll want to make a few pair for yourself).
MATERIALS:
- Two matched 18mm Nirvana Beads Czech buttons
- Two 18 mm bezel back with lever hook – antique brass finish
- Glue (E600 or product of similar clear bonding strength)
- Flush wire cutting pliers *
ASSEMBLING:
- For your first pair, start with a pair of 18 mm Czech buttons with wire shanks. *
- Prop the bezel of the earring back on a small bead tube or any slightly elevated surface that will allow it sit level on the lever as the glue dries
- Remove the shank with your pliers as close to the base as possible without marring the surface.
- Place a small amount of glue in the center of the bezel and line up the Czech button pattern with the lever
- Gently place the orientated bead in the center of the bezel, causing the glue to spread slightly as you press. The glue should not come to the edges or be visible.
- Allow your earring to set undisturbed for a little longer than the recommended time for the glue you have chosen
- Repeat for Step 2 for the second earring.
*Nirvana beads shows the front and back of all our Czech glass buttons on our website and we have many offerings in both the traditional wire shank referenced above and more contemporary, molded glass shanks.
If you have the right tools and experience working with precision tools, you can remove the glass shanks as I did, but it is not for home experimentation without good tools, experience with those those tools and appropriate safety measures including goggles. Before beads and art came into my life I was a dental student and still have some great tools to use. The dental micromotor is very precise, much easier to control than the rotary tools used by jewelry designers and hobbyist. With either tool you will need to find the right size burs for each machine- a 3/32 for a micro motor or 1/8in for a rotary tool.
Many Czech glass buttons have a coating in the back. When you are removing the shank, be careful not to remove that coating on the back surface of the button. If there is an scratch on the back surface, it may be visible on the front of the button.
If there is a lot of metal or glass to cut at high speed, use water to cool down the bit. Have a plastic container with water on it and be sure to submerge only the visible part of the bit to cool it down. Too much heat from your tool can break the glass.
EXAMPLES OF MY EARRINGS:


 CYNTHIA SHANTI MORALEZ
Shanti designs most of the beads and buttons produced for Nirvana Beads. She is also a Graphic and Web Designer